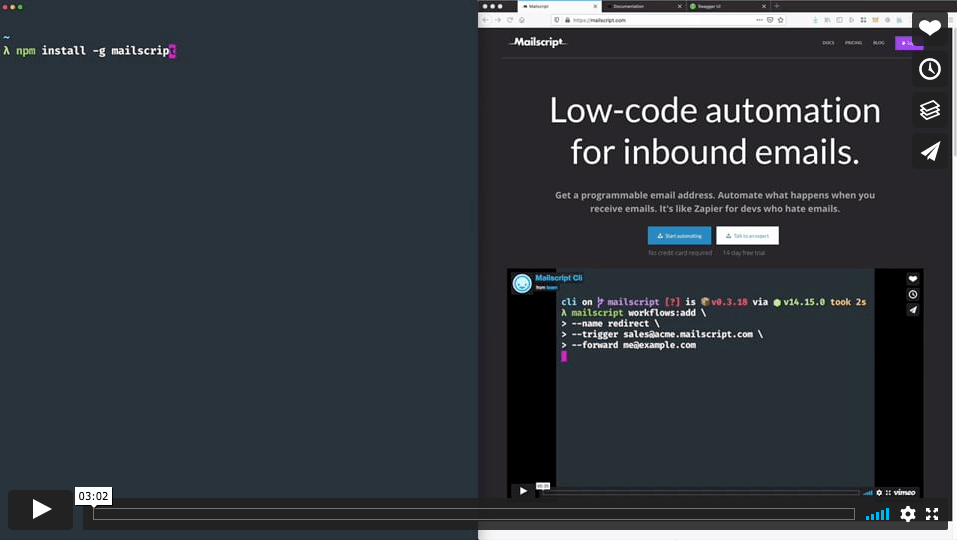
$ mailscript login... You should see a browser window open prompting you to login to your Mailscript account. The daemon will handle the rest upon completion
Assembly template for STM32F4 family of products using Cortex-M4 that turns on an LED connected to GPIO pin 12.
Note that
This is a simple template to demonstrate the necessary items to write to a GPIO pin for educational purposes.
It does not need any additional libraries or startup codes.
Data section is not initialized, so if you use RAM, things might not work as intended.
Clock settings are left default.
Tested on STM32F4 Discovery board.
Installation
Clone the project using git clone https://github.com/fcayci/stm32f4-assembly.
Development
There are two options for development. First one is to use STM32CubeIDE from ST. Second one is the setup your own development environment. Both options are supported with relevant project settings or makefiles.
Option 1 – STM32CubeIDE
Download and install STM32CubeIDE. Select a workspace then import existing project to your workspace.
You do not need any additional tools. It comes with the compiler and debugger pre-installed.
For windows only, install make tool. You can just get the make tool from gnuwin32. Alternatively you can install the minimalist GNU tools for windows from mingw and MSYS
For the programmer/debugger, you can use – stlink or OpenOCD. Though only stlink utility support is added.
You can use your favorite code editor to view/edit the contents. Here is an open source one: Visual Studio Code.
Compile
makefile contains the necessary build scripts and compiler flags.
Browse into the directory and run make to compile. You should see a similar output as shown below.
Cleaning...
Building template.s
   text    data     bss     dec     hex filename
     60       0       0      60      3c template.elf
Successfully finished...
If you see any errors about command not found, make sure the toolchain binaries are in your PATH. On Windows check the Environment Variables for your account. On Linux/macOS run echo $PATH to verify your installation.
Program
Run make burn to program the chip.
...
Flash written and verified! jolly good!
Install the ST LINK drivers if you cannot see your board when make burn is run.
Disassemble
Run make disass to disassamble.
Debug
In order to debug your code, connect your board to the PC, run st-util (comes with stlink utility) from one terminal, and from another terminal within the project directory run make debug. You can then use general gdb commands to browse through the code.
SCAMP (Suite for Computer-Assisted Music in Python)
SCAMP is an computer-assisted composition framework in Python designed to act as a hub, flexibly connecting the
composer-programmer to a wide variety of resources for playback and notation. SCAMP allows the user to
manage the flow of musical time, play notes either using FluidSynth or via MIDI or OSC messages
to an external synthesizer, and ultimately quantize and export the result to music notation in the form of MusicXML or Lilypond.
Overall, the framework aims to address pervasive technical challenges while imposing as little as possible on the aesthetic choices
of the composer-programmer.
Features
Flexible and extensible playback: Although SCAMP comes with a basic general MIDI soundfont,
any .sf2 or .sf3 soundfont can be used, and playback can also include MIDI or OSC messages to external
programs or synthesizers, which effectively offers limitless sonic possibilities.
Note-based, but in a broad sense: Although SCAMP conceives of music in terms of notes, notes in
SCAMP are extremely flexible sound-objects that can include the continuous evolution of arbitrary
playback parameters.
Effortless microtonality: to play the G above middle C 30 cents sharp, the user has only
to use the MIDI pitch 67.3. Behind the scenes, SCAMP manages all the MIDI pitchbend
messages, placing notes on separate channels where necessary so that these messages do
not conflict.
Effortless playback of glissandi and dynamic envelopes. Both pitch and volume can follow
arbitrary curves defined using the expenvelope package.
Flexible and precise polyphonic tempo control using clockblocks.
In SCAMP, different layers of music moving at different tempi can be interwoven with one
another while remaining coordinated. Smooth accelerandi and ritardandi are possible, and the
resulting music can be quantized according to the tempo of any layer.
Sensible and flexible quantization. The user has a fine degree of control over how rhythms
are quantized and over the degree of complexity in the resulting notation.
Philosophy
Compositional tools always feature some degree of trade-off between functionality and freedom;
every feature that is made available to the user steers them in a certain direction. For
instance, if a framework provides abstractions for manipulating harmonies, the user may find
themselves (perhaps unconsciously) pushed in the direction of a particular harmonic language.
While this may be a worthwhile trade-off in many cases, it is not the goal of SCAMP. Here,
the goal is to provide general purpose tools, to remove the drudgery of implementing practical
functionality that is needed again and again. Beyond this scope, users are encouraged to write
and share their own extensions to suit their own compositional inclinations. (Several such
extensions are available in the scamp_extensions package.)
Other key values underlying this framework are:
Playback first, notation second: SCAMP has been designed so that the user interacts with an
ensemble, not a score. This way, ideas can be quickly auditioned and iterated over based on the
sonic result. Once the result is deemed satisfactory, the user can then export it as music notation.
Compact and expressive code: Efforts have been made to make user code simple, yet powerful.
One of the ways this is accomplished is through sensible defaults; although there is a lot of
functionality under the hood, it shouldn’t be encountered by the user until it is needed.
Modularity and adherence as much as possible to the Unix Philosophy.
SCAMP bundles a number of tools together for convenience, but it may be more than a given user
needs. For this reason, the MusicXML export capability is available separately as pymusicxml, the flexible musical Envelope
class is available separately as expenvelope,
and the system for managing musical time is available separately as clockblocks.
Installation & Requirements
On a properly configured computer, installing SCAMP is as simple as opening a terminal and
running:
pip3 install --user scamp
(This installs it for a single user. To install it for all users on a computer, use sudo pip3 install scamp and enter your administrator password.)
Each of these steps is described in greater detail below. After configuring the computer and
running pip3 install --user scamp, you should be able to test the installation by:
Opening a terminal and typing python3 to start an interactive python session.
Typing in from scamp import test_run; test_run.play() and pressing return.
If you here a piano gesture sweeping inward towards middle C, SCAMP has installed correctly!
You should be greeted with “Python 3.10” or something similar in response. If so, you’re all set!
If you get something like “command not found” instead, it’s likely that something went wrong in the process of installation.
Windows
As on a Mac, you can download and install Python 3 here: https://www.python.org/downloads/.
In the installer, be sure to select “Add Python 3.10 to PATH”. This allows you to invoke python from the Command Prompt
by typing either python or py, and this should also default to the latest version of python. Test that all went
according to plan by typing:
python --version
You should be greeted with “Python 3.10” or something similar in response. If so, you’re all set! For all other installation instructions below, use python instead of python3 and pip instead of pip3.
Linux
On Linux, Python 3.10 or greater is often already installed by default. Again, you can check this
by opening a terminal and running:
python3 --version
If your version of python is already 3.10 or greater, you’re good to go. However, if your version
of Python 3 is less than 3.10, you will have to install python 3.10 or higher, e.g. from a third
party PPA.
2) (Linux only) Installing FluidSynth
SCAMP requires FluidSynth for soundfont playback, but on both Mac and Windows — due to
the lack of a default package manager — it became clear that the path of least resistance was to
include the compiled FluidSynth library within the SCAMP package. For this reason, you don’t need to
take the step of installing FluidSynth to use SCAMP on Mac or Windows.
Since Linux distros have package managers, it makes more sense to have users take the extra
step to install FluidSynth that way. On apt-based distros like Debian and Ubuntu,
it’s as simple as running:
sudo apt install fluidsynth
You are now the proud owner of a FluidSynthesizer!
3) (Optional) Installing python-rtmidi
For midi input, and also to generate an outgoing midi stream (which could, for instance, be
routed to a DAW), you will need the python-rtmidi
library. You can get this by running from a terminal:
pip3 install --user python-rtmidi
On Linux, if you’re running into an error you may need to first install the python3-dev
package, for instance with the command:
sudo apt install python3-dev
For any other python-rtmidi installation woes, take a look at the installation instructions here.
4) (Optional) Installing abjad and LilyPond
For LilyPond output, you will need the abjad library. To do so,
run the following:
pip3 install abjad
Note that abjad sometimes changes in a way that breaks compatibility with SCAMP. If you are using a version of abjad
that is more recent than the one SCAMP was tested with, a warning will indicate this fact when you try to use
it to generate notation.
The scamp_extensions package is the place for models of music-theoretical concepts (e.g. scales, pitch-class sets),
additional conveniences for interacting with various types of input and output, and in general anything that builds
upon SCAMP but is outside of the scope of the main framework.
The easiest way to install scamp_extensions is by running the command:
pip3 install --user scamp_extensions
To install the most up-to-date version (assuming you have git installed), you can instead run:
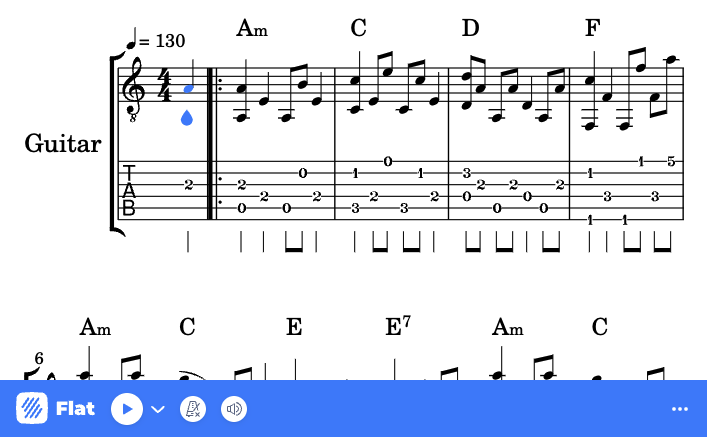
The simplest way to get started is to pass a DOM element to our embed that will be used as container. By default, this one will completely fit its container:
Our Embed JS API requires an App ID (appId) to use it:
In development, you can try and use this client without limits on localhost/*.localhost.
To use it in production or with a custom domain, create a new app on our website, then go to the Embed > Settings and add your domains to the whitelist. Your app ID will also be displayed on this page.
This identifier must be a unique identifier for the user. For example, you can use the user ID of your application. Please don’t use any personal information (e.g. email address).
When instantiating Flat.Embed, the first argument will always refer to a DOM element. It can take:
A DOM element (e.g. selected using document.getElementById('embed-container')).
The string identifier of the element (e.g. "embed-container").
An existing embed iframe element. In this case, this one will need to have our JS API loaded using the query string jsapi=true.
If you instance a different Flat.Embed for the same element, you will always get the same instance of the object.
Options and URL parameters
When instantiating Flat.Embed, you can pass options in the second parameter. To use the different methods available and events subscriptions, you will need to pass at least embedParams.appId.
Option
Description
Values
Default
score
The score identifier that will load initially
Unique score id
blank
width
The width of your embed
A width of the embed
100%
height
The height of your embed
A height of the embed
100%
embedParams
Object containing the loading options for the embed
// Wait for the embed to be readyawaitembed.ready();// Load a scoreawaitembed.loadFlatScore('SCORE_ID');// Control playbackawaitembed.play();awaitembed.pause();awaitembed.stop();// Listen to eventsembed.on('play',()=>{console.log('Playback started');});embed.on('cursorPosition',position=>{console.log('Cursor moved:',position);});
Full API Reference
Our SDK provides 60+ methods to control and interact with embedded scores:
This SDK includes TypeScript definitions out of the box. All methods and events are fully typed for better development experience.
importEmbedfrom'flat-embed';constembed=newEmbed(container,{score: 'SCORE_ID',embedParams: {appId: 'YOUR_APP_ID',mode: 'view',// TypeScript knows valid modes},});// Full type checking and autocompletionconstparts=awaitembed.getParts();
DevTaskFlow is a task management application built with Angular and Node.js, featuring user authentication, task filtering, sorting, and management capabilities. The app includes login, registration, password recovery, and authentication guards for secured access.
Features
✅ Task Management
Add, edit, delete, and complete tasks
Task priority system (Low, Medium, High)
Task filtering by completion status, priority, and overdue deadlines
Task sorting by date and priority
Task searching
Pinned tasks feature
Pagination for tasks
✅ Authentication
User registration and login using MongoDB
Password hashing with bcrypt
JWT-based authentication with token storage
Forgot password feature (sends a new password via email)
Route guard to protect task management routes
Logout functionality
✅ UI & UX
Angular Material design
Responsive UI with dynamic theme switching
Dark/White mode toggle
Form validation with proper error handling
Preloaders for login, registration, and password recovery
Confirmation dialogs for critical actions (e.g., deleting all tasks)
Navigation Menu for better usability
✅ Automated Testing & CI/CD
Unit Testing: Jasmine & Karma for frontend unit tests
Continuous Integration: GitHub Actions runs automated unit tests
Deployment Checks: Vercel deploys only if tests pass
Test Reports: JUnit reports uploaded to GitHub Actions
Tech Stack
Frontend: Angular 16, Angular Material
Backend: Node.js, Express.js, MongoDB (Mongoose)
Authentication: JWT, bcrypt.js
Email Service: Nodemailer with AOL SMTP
Hosting: Vercel (Frontend), Render (Backend)
Testing & CI/CD: Jasmine, Karma, GitHub Actions
Installation & Setup
Backend Setup
Clone the repository:
git clone https://github.com/art2url/dev-task-flow-auth-server.git
cd dev-task-flow-auth-server
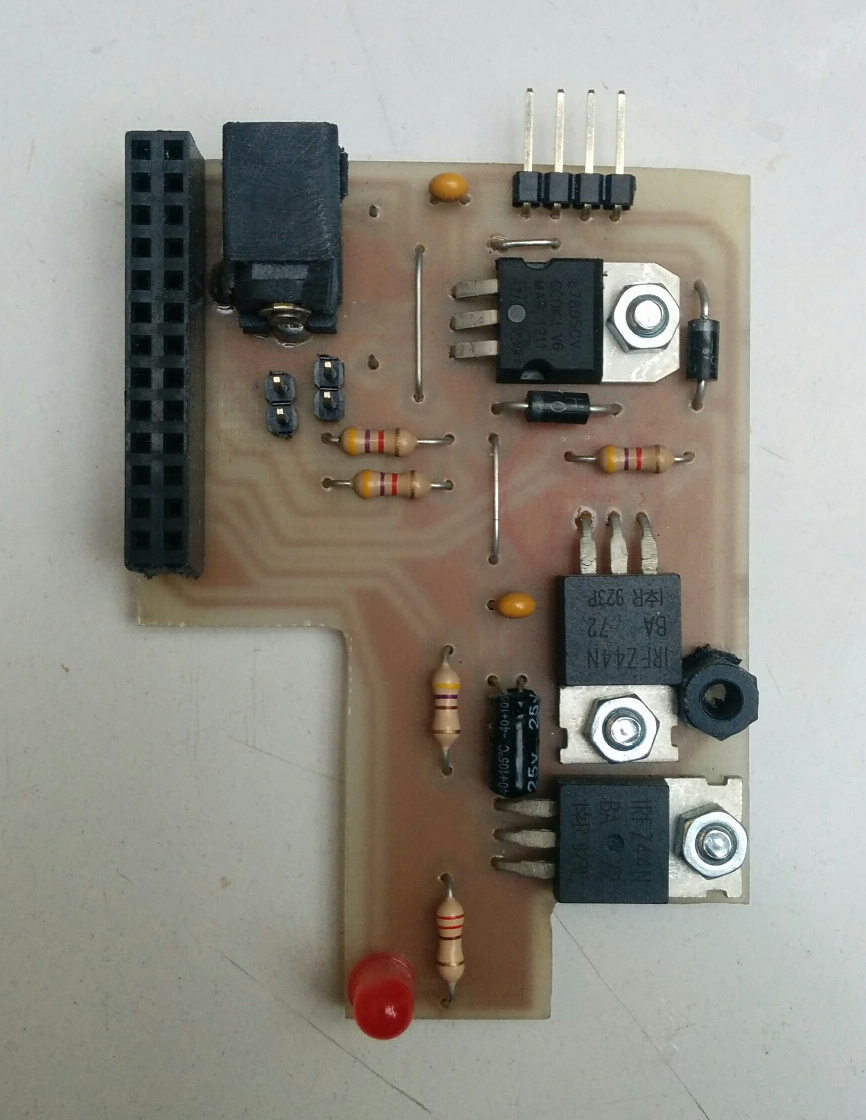
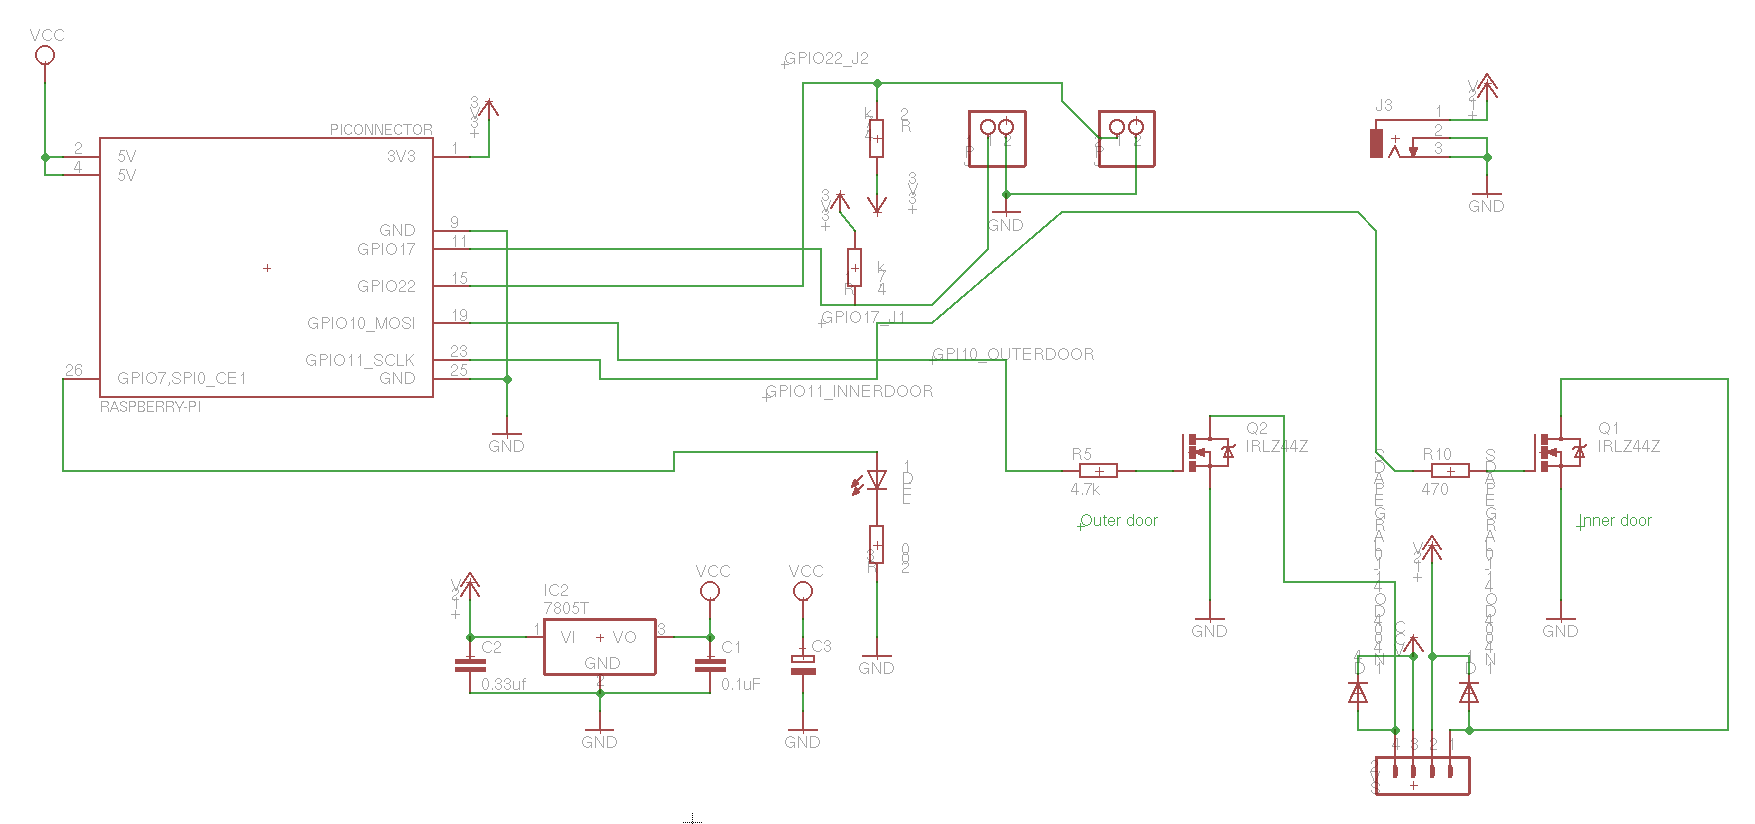
Breakout design (in EAGLE) and source code for our door lock actuator, running on a Raspberry PI(1).
Communication with the lock happens over MQTT.
Does not contain user interface, check door-web for that.
MQTT interface
To open the door, send the number of seconds to open to:
/bitraf/door/$door_id/open # Ex: 20
On success, will output values:
/bitraf/door/$door_id/isopen # Ex: true/false
/bitraf/door/$door_id/openuntil # Unix timestamp when door will lock again. Ex: 1495469392
On error, will send a string with an error message:
/bitraf/door/$door_id/error # Ex: "Time to open is negative"
Where $door_id is for instance 2floor, frontdoor, 4floor.
The /bitraf/door/ prefix is configurable, can be set to /mysystem/doorlocks.
Create a folder in your mission root folder and name it node_modules. Then create one inside there and call it grad-leaveNotes. If you want to use a different folder name, you have to preped your description.ext with #define MODULES_DIRECTORY <yourFolderName>.
Download the contents of this repository ( there’s a download link at the side ) and put it into the directory you just created.
see step 3 below in the npm part
Via npm
for details about what npm is and how to use it, look it up on npmjs.com
Append the following lines of code to the description.ext:
#include"node_modules\grad-leaveNotes\grad_leaveNotes.hpp"
class CfgFunctions {
#include"node_modules\grad-leaveNotes\cfgFunctions.hpp"
};
class CfgSounds {
sounds[] = {};
#include"node_modules\grad-leaveNotes\cfgSounds.hpp"
};
Usage
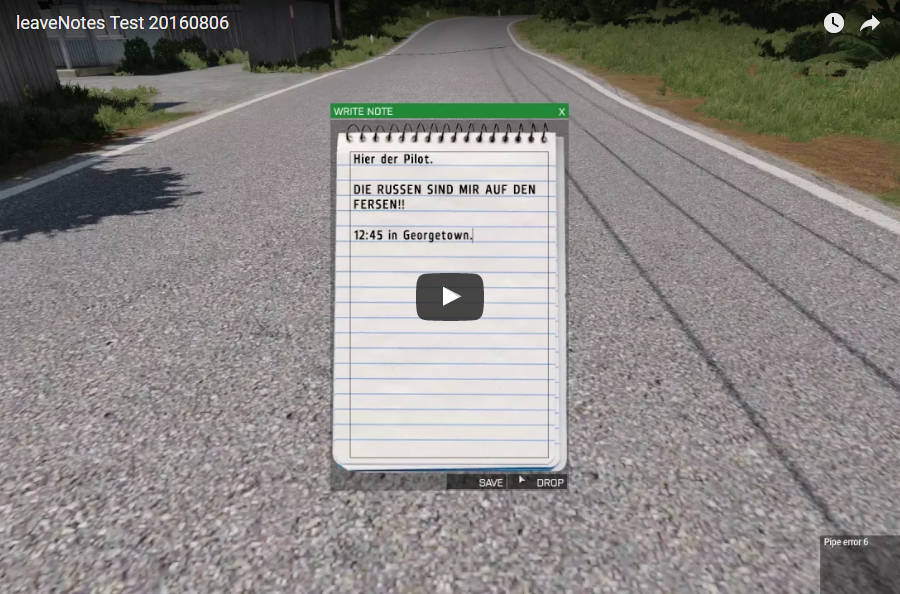
Using the notes system is fairly intuitive. Open up your ACE selfinteraction menu, go to “Equipment”, “Notes” and choose “Write Note”. A notepad will open up. Write whatever you like, then hit “SAVE” to put the note into your virtual inventory or hit “DROP” to place it on the ground. Use your ACE interaction key to read, pick up or destroy notes on the ground. Use your selfinteraction menu and go to “Equipment”, “Notes” again to read, drop or destroy notes in your virtual inventory.
Use this function to enable/disable a unit to write notes (default is true): [unit, allow] call GRAD_leaveNotes_fnc_allowWriting;
Use this function to enable/disable a unit to inspect notes (default is true): [unit, allow] call GRAD_leaveNotes_fnc_allowInspection;
Use this function to set how many notes a unit can write (default is 10): [unit, amount] call GRAD_leaveNotes_fnc_setAmount;
All of these function have to be called either on server or or client where unit is local.
Parameter
Type
Explanation
unit
object
The unit this applies to
allow
bool
Enable or disable this ability
amount
number
Amount of notes this unit can write. (Does not add to remaining amount.)
Configuration
You can configure this module in your description.ext. This is entirely optional however, since every setting has a default value.
Add the class GRAD_leaveNotes to your description.ext, then add any of these attributes to configure the module:
Attribute
Default Value
Explanation
startAmount
10
(Number) How many notes a player can write by default.
noteObject
“Land_Notepad_F”
(String) Note object class name.
actOffset[]
{0,0,0.1}
(Array) Note object interaction point offset.
actDist
2
(Number) Note object interaction distance.
playerDistance
1
(Number) Distance to player at which notes will be dropped.
visibleHandwriting
1
(1/0) is a player’s handwriting represented by a specific font?
canWriteDefault
1
(1/0) Can everyone write notes by default?
canInspectDefault
1
(1/0) Can everyone inspect a note’s handwriting by default?
By default, a note’s handwriting is represented by one of 9 fonts. So most of the times you will know that two notes are from two different authors simply by looking at them. However if two notes do seem to have the same handwriting, only inspecting them will tell you more.
Each font has an adjective that it is described by. For example: “EtelkaMonospacePro” will show up as “elegant” handwriting upon inspection. Every handwriting also has one of three modifiers, “somewhat”, “quite”, and “remarkably”. So if two notes have the same font but show up as “quite elegant” and “somewhat elegant”, they must have been written by different authors.
9 adjevtives and 3 modifiers give us a total of 27 different handwritings. So depending on number of players, two or more people in your game might have the same.
Up-to-date next-gen implementation can be found here.
EssentialCosmeticsUnlocker
Client-side only patch that allows you to unlock ALL cosmetics (+ emotes) in the Essential mod. Works on every version of Essential MC (1.8.9 – 1.21).
How to use
Grab the .jar you need from the Releases and place it in your .minecraft\mods\ folder. Take the time to go over the Compatibility table and its Notes.
Features
Efficient, single class and light-weight thanks to mixins.
Unlock ALL cosmetics and emotes (including developer).
Universally compatible with any version (view Compatibility table).
Saves equipped cosmetics to config file located in AppData/Roaming/ecu.
Loads equipped cosmetics from config file when you toggle the Hide/Show My Cosmetics button.
Dumps cosmetic data in AppData/Roaming/ecu (texture, geometry) when opening the game. Useful for those looking to replicate the cosmetics in their own projects.
Compatibility
Feel free to contribute to this table with a PR and a convincing screenshot. Only the major versions are tested as it takes time to do it manually.
MC Major Version
Forge
Fabric*
Last Checked (dd/mm/yyyy)
1.8
❌ broken^
⬛ not applicable
24/05/2024
1.12
❌ broken^️
⬛ not applicable
1.16
❌ broken
❌ broken
1.17
❌ broken️
❌ broken
19/11/2024
1.18
❌ broken️
❌ broken
1.19
❌ broken️
❌ broken
1.20
❌ broken
❌ broken
19/11/2024
1.21
❌ broken
❌ broken
19/11/2024
Last Essential version checked: v1.3.5.3
We are aware that ecu doesn’t work with the current version of essential. Either downgrade essential to v1.3.5.1 or join the discord for support.
* The mod you have downloaded from essential or modrinth is the installer/updater mod. Instead, the one that you need to place in your mods folder is the one which is located in .minecraft\essential\. You need to manually run the game with the installer/updater mod once for it to appear in that folder.
^ Use the legacy release -legacy.jar which has no mod class, but has shaded mixin. This is necessary because functionality changes overtime.
Disclaimer
This is for educational purposes only. I am not responsible for any damage caused by this tool.
                                 Apache License
                           Version 2.0, January 2004
                        http://www.apache.org/licenses/

   TERMS AND CONDITIONS FOR USE, REPRODUCTION, AND DISTRIBUTION

   1. Definitions.

      "License" shall mean the terms and conditions for use, reproduction,
      and distribution as defined by Sections 1 through 9 of this document.

      "Licensor" shall mean the copyright owner or entity authorized by
      the copyright owner that is granting the License.

      "Legal Entity" shall mean the union of the acting entity and all
      other entities that control, are controlled by, or are under common
      control with that entity. For the purposes of this definition,
      "control" means (i) the power, direct or indirect, to cause the
      direction or management of such entity, whether by contract or
      otherwise, or (ii) ownership of fifty percent (50%) or more of the
      outstanding shares, or (iii) beneficial ownership of such entity.

      "You" (or "Your") shall mean an individual or Legal Entity
      exercising permissions granted by this License.

      "Source" form shall mean the preferred form for making modifications,
      including but not limited to software source code, documentation
      source, and configuration files.

      "Object" form shall mean any form resulting from mechanical
      transformation or translation of a Source form, including but
      not limited to compiled object code, generated documentation,
      and conversions to other media types.

      "Work" shall mean the work of authorship, whether in Source or
      Object form, made available under the License, as indicated by a
      copyright notice that is included in or attached to the work
      (an example is provided in the Appendix below).

      "Derivative Works" shall mean any work, whether in Source or Object
      form, that is based on (or derived from) the Work and for which the
      editorial revisions, annotations, elaborations, or other modifications
      represent, as a whole, an original work of authorship. For the purposes
      of this License, Derivative Works shall not include works that remain
      separable from, or merely link (or bind by name) to the interfaces of,
      the Work and Derivative Works thereof.

      "Contribution" shall mean any work of authorship, including
      the original version of the Work and any modifications or additions
      to that Work or Derivative Works thereof, that is intentionally
      submitted to Licensor for inclusion in the Work by the copyright owner
      or by an individual or Legal Entity authorized to submit on behalf of
      the copyright owner. For the purposes of this definition, "submitted"
      means any form of electronic, verbal, or written communication sent
      to the Licensor or its representatives, including but not limited to
      communication on electronic mailing lists, source code control systems,
      and issue tracking systems that are managed by, or on behalf of, the
      Licensor for the purpose of discussing and improving the Work, but
      excluding communication that is conspicuously marked or otherwise
      designated in writing by the copyright owner as "Not a Contribution."

      "Contributor" shall mean Licensor and any individual or Legal Entity
      on behalf of whom a Contribution has been received by Licensor and
      subsequently incorporated within the Work.

   2. Grant of Copyright License. Subject to the terms and conditions of
      this License, each Contributor hereby grants to You a perpetual,
      worldwide, non-exclusive, no-charge, royalty-free, irrevocable
      copyright license to reproduce, prepare Derivative Works of,
      publicly display, publicly perform, sublicense, and distribute the
      Work and such Derivative Works in Source or Object form.

   3. Grant of Patent License. Subject to the terms and conditions of
      this License, each Contributor hereby grants to You a perpetual,
      worldwide, non-exclusive, no-charge, royalty-free, irrevocable
      (except as stated in this section) patent license to make, have made,
      use, offer to sell, sell, import, and otherwise transfer the Work,
      where such license applies only to those patent claims licensable
      by such Contributor that are necessarily infringed by their
      Contribution(s) alone or by combination of their Contribution(s)
      with the Work to which such Contribution(s) was submitted. If You
      institute patent litigation against any entity (including a
      cross-claim or counterclaim in a lawsuit) alleging that the Work
      or a Contribution incorporated within the Work constitutes direct
      or contributory patent infringement, then any patent licenses
      granted to You under this License for that Work shall terminate
      as of the date such litigation is filed.

   4. Redistribution. You may reproduce and distribute copies of the
      Work or Derivative Works thereof in any medium, with or without
      modifications, and in Source or Object form, provided that You
      meet the following conditions:

      (a) You must give any other recipients of the Work or
          Derivative Works a copy of this License; and

      (b) You must cause any modified files to carry prominent notices
          stating that You changed the files; and

      (c) You must retain, in the Source form of any Derivative Works
          that You distribute, all copyright, patent, trademark, and
          attribution notices from the Source form of the Work,
          excluding those notices that do not pertain to any part of
          the Derivative Works; and

      (d) If the Work includes a "NOTICE" text file as part of its
          distribution, then any Derivative Works that You distribute must
          include a readable copy of the attribution notices contained
          within such NOTICE file, excluding those notices that do not
          pertain to any part of the Derivative Works, in at least one
          of the following places: within a NOTICE text file distributed
          as part of the Derivative Works; within the Source form or
          documentation, if provided along with the Derivative Works; or,
          within a display generated by the Derivative Works, if and
          wherever such third-party notices normally appear. The contents
          of the NOTICE file are for informational purposes only and
          do not modify the License. You may add Your own attribution
          notices within Derivative Works that You distribute, alongside
          or as an addendum to the NOTICE text from the Work, provided
          that such additional attribution notices cannot be construed
          as modifying the License.

      You may add Your own copyright statement to Your modifications and
      may provide additional or different license terms and conditions
      for use, reproduction, or distribution of Your modifications, or
      for any such Derivative Works as a whole, provided Your use,
      reproduction, and distribution of the Work otherwise complies with
      the conditions stated in this License.

   5. Submission of Contributions. Unless You explicitly state otherwise,
      any Contribution intentionally submitted for inclusion in the Work
      by You to the Licensor shall be under the terms and conditions of
      this License, without any additional terms or conditions.
      Notwithstanding the above, nothing herein shall supersede or modify
      the terms of any separate license agreement you may have executed
      with Licensor regarding such Contributions.

   6. Trademarks. This License does not grant permission to use the trade
      names, trademarks, service marks, or product names of the Licensor,
      except as required for reasonable and customary use in describing the
      origin of the Work and reproducing the content of the NOTICE file.

   7. Disclaimer of Warranty. Unless required by applicable law or
      agreed to in writing, Licensor provides the Work (and each
      Contributor provides its Contributions) on an "AS IS" BASIS,
      WITHOUT WARRANTIES OR CONDITIONS OF ANY KIND, either express or
      implied, including, without limitation, any warranties or conditions
      of TITLE, NON-INFRINGEMENT, MERCHANTABILITY, or FITNESS FOR A
      PARTICULAR PURPOSE. You are solely responsible for determining the
      appropriateness of using or redistributing the Work and assume any
      risks associated with Your exercise of permissions under this License.

   8. Limitation of Liability. In no event and under no legal theory,
      whether in tort (including negligence), contract, or otherwise,
      unless required by applicable law (such as deliberate and grossly
      negligent acts) or agreed to in writing, shall any Contributor be
      liable to You for damages, including any direct, indirect, special,
      incidental, or consequential damages of any character arising as a
      result of this License or out of the use or inability to use the
      Work (including but not limited to damages for loss of goodwill,
      work stoppage, computer failure or malfunction, or any and all
      other commercial damages or losses), even if such Contributor
      has been advised of the possibility of such damages.

   9. Accepting Warranty or Additional Liability. While redistributing
      the Work or Derivative Works thereof, You may choose to offer,
      and charge a fee for, acceptance of support, warranty, indemnity,
      or other liability obligations and/or rights consistent with this
      License. However, in accepting such obligations, You may act only
      on Your own behalf and on Your sole responsibility, not on behalf
      of any other Contributor, and only if You agree to indemnify,
      defend, and hold each Contributor harmless for any liability
      incurred by, or claims asserted against, such Contributor by reason
      of your accepting any such warranty or additional liability.

   END OF TERMS AND CONDITIONS

   APPENDIX: How to apply the Apache License to your work.

      To apply the Apache License to your work, attach the following
      boilerplate notice, with the fields enclosed by brackets "[]"
      replaced with your own identifying information. (Don't include
      the brackets!)  The text should be enclosed in the appropriate
      comment syntax for the file format. We also recommend that a
      file or class name and description of purpose be included on the
      same "printed page" as the copyright notice for easier
      identification within third-party archives.

   Copyright [yyyy] [name of copyright owner]

   Licensed under the Apache License, Version 2.0 (the "License");
   you may not use this file except in compliance with the License.
   You may obtain a copy of the License at

       http://www.apache.org/licenses/LICENSE-2.0

   Unless required by applicable law or agreed to in writing, software
   distributed under the License is distributed on an "AS IS" BASIS,
   WITHOUT WARRANTIES OR CONDITIONS OF ANY KIND, either express or implied.
   See the License for the specific language governing permissions and
   limitations under the License.